
Everything involved in running NextaPanel as an agency - your servers, your clients, and the business side of it.
Go to Servers in the sidebar, then click + New Server. The form has three short steps:
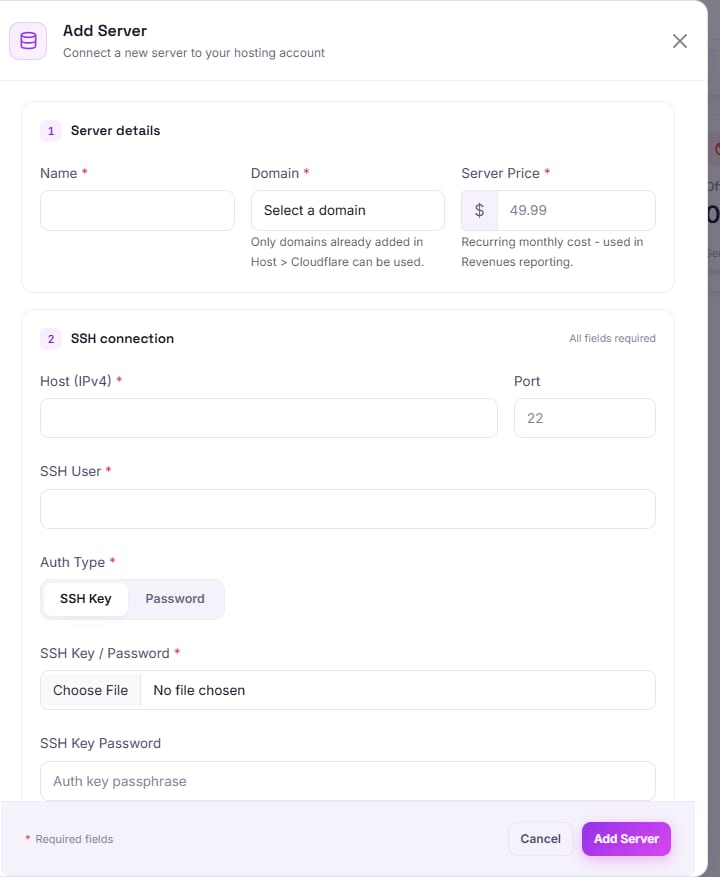
Click Add Server. The panel checks the server is reachable and running Ubuntu 22.04 or newer, then provisions it automatically over SSH: Docker, Nginx with a self-signed certificate, a resource monitor, and a container auto-heal script. This usually takes a few minutes.
Once connected, a server's card on My Servers shows its live status and memory/storage usage over 1h, 5h, 10h and 24h windows. From there you can:
Go to DB Servers in the sidebar, click + Add, and choose an engine (MySQL, PostgreSQL, or MongoDB). The form has two steps:
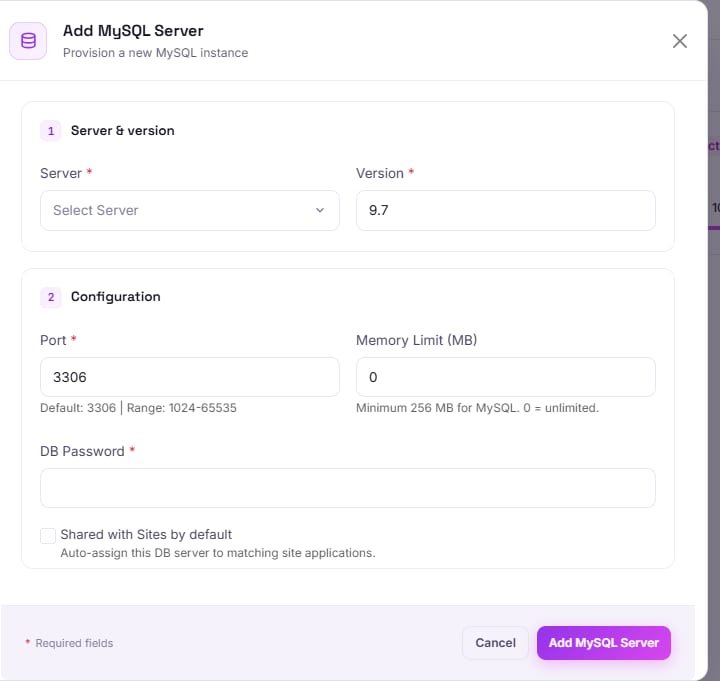
Click Add MySQL Server (or the equivalent for your chosen engine). From the resulting card you can rotate the password live, toggle remote access on or off, and open phpMyAdmin (MySQL) or Adminer (Postgres/Mongo) in one click - both include a built-in terminal straight into the container.
From Email Services, add a mail server and pick which connected MySQL server backs it. Choose which protocols to expose - sending, receiving, secure submission, and IMAP - each a simple toggle. A TLS certificate for the mail server is generated automatically at build time.
Webmail is a single RoundCube install per agency account; opening a mailbox from any of your mail servers signs the client into the right backend automatically.
Connect a Cloudflare account once - by API token or the full OAuth flow. From there you can add a new domain or import a zone you already manage, add or edit any DNS record type (A, AAAA, CNAME, MX, TXT, NS, SRV, CAA), and set IP access rules to allow, block or challenge by IP, range or country.
A domain doesn't need a site ready for it right away - hold it in your domain pool and assign it whenever you are.
Any server with a gateway installed runs its own private Nginx reverse-proxy container. From Gateway, add a route sending a domain to a container, a local target, or a remote one, over HTTP, HTTPS, TCP or WebSocket - with a path prefix, custom headers, a host-header override, a redirect, or maintenance mode.
Traffic can be spread across more than one backend (round robin, least-connections, IP-hash, weighted, or random), with backups that only activate if the primary goes down. A migration tool moves a site still on its own published port over to gateway routing safely, with a reachability check and rollback.
From Cloud Storage, add a connection - SFTP, FTP, Backblaze, or Hetzner - with a host, port, username, password and, for object storage, a bucket. The connection is tested immediately. Point a client's plan at it, and backups start landing there automatically on the schedule the plan already defines.
From Firewall, add a rule scoped to a server: allow or block, one or more ports, one or more IPs. It's applied immediately as a real iptables rule over SSH and persisted so it survives a reboot.
Go to Users in the sidebar, then click + Add User. The form has three steps:
Tick one or more of your site plans, and set a Qty next to each - useful if a plan allows more than one unit per client.
Set the account to Active or another status. New accounts are created with the "user" role, a verification email goes out automatically, and the client must verify it before they can log in.
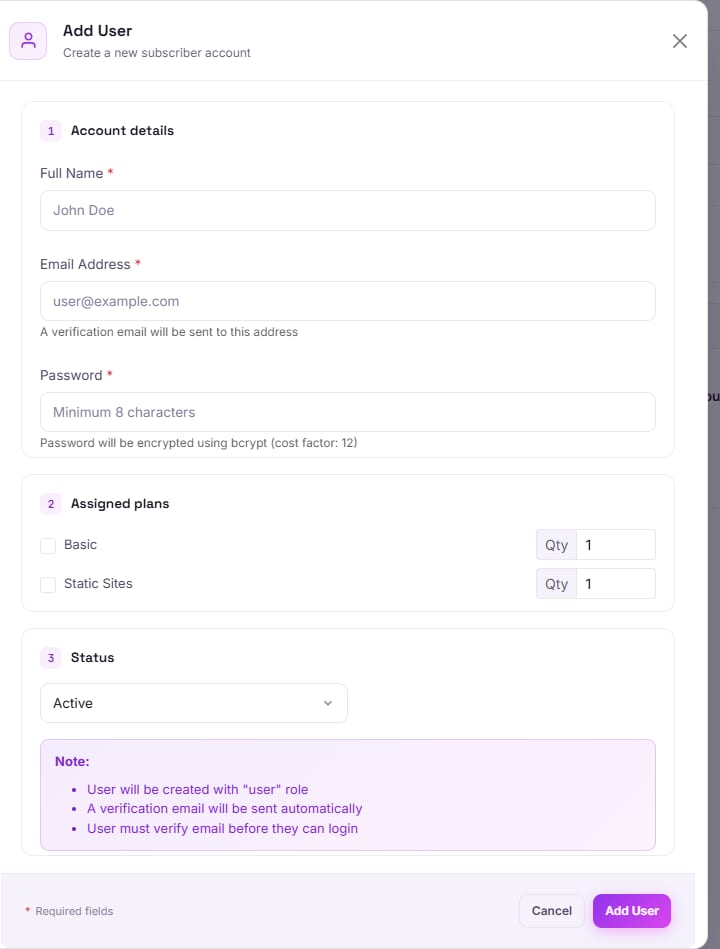
Click Add User. The panel places their sites on whichever of your servers currently has the most free capacity. You can resend their verification email or mark them verified yourself later from the same page. Removing a client is a soft delete - every real site, container and database they own is torn down properly, while their invoice history is kept for your own records.
Go to Site Plans in the sidebar, then click + Add Site Plan. The form has several short sections:
Email Sending Enable and Staging Site Allowed are simple checkboxes. Under Allowed Site Types, tick which of WordPress, Laravel, PHP Site and Node.js a client on this plan is allowed to create.
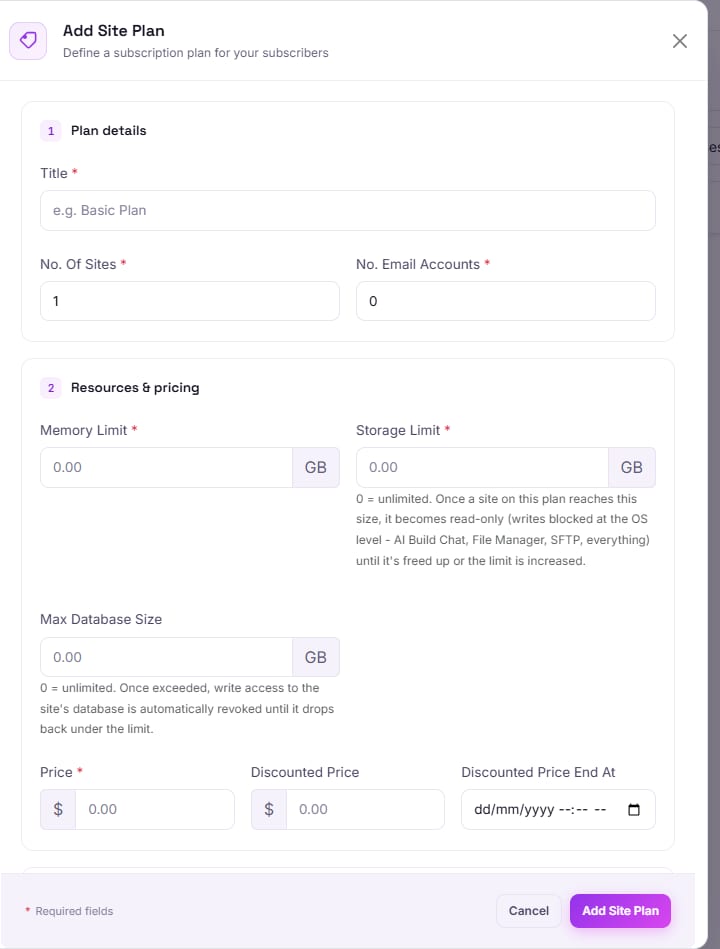
Click Add Site Plan. None of these limits are cosmetic - periodic checks lock a site's files or revoke database privileges the moment a client goes over what their plan allows.
From Billing > Payment Methods, connect a real way to collect payment from your clients instead of the honor-system default (where you mark invoices paid by hand). Three methods, each independent:
Turn a method on and its fields appear; save just that one card without affecting the others. Once saved, a credential is shown masked - click Change to replace it, or leave it alone to keep what's already saved.
With at least one method enabled, your clients get a real checkout - at signup, when subscribing to a new plan, and when paying an invoice - instead of the free/instant flow. PayPal and Stripe activate automatically the moment payment completes; an Offline submission needs your review first, from the Pending Approvals tab on the same page - approve it to activate the subscription or mark the invoice paid, or reject it with a reason the client will see.
From Invoices, generate invoices for a billing period across every active client plan at once, or handle one client's invoice from their own page. Mark invoices paid as payments arrive, and filter by paid, unpaid or overdue. Your own server costs are tracked as a separate set of invoices (Server Invoices), kept apart from client revenue.
Server Invoices are what you owe for hosting your own servers on the platform - billed to you the same way you bill your clients. If the platform has a payment method enabled, an unpaid Server Invoice gets a Pay Now button (on the invoice list, and again inside the invoice itself) offering whichever of PayPal, Stripe or Offline Payment are currently available.
PayPal and Stripe mark the invoice paid the moment payment completes. An Offline submission is reviewed by the platform before it's marked paid - you'll see its status update once that happens. Either way, a paid invoice shows exactly how it was paid and its transaction ID, right on the invoice itself.
From Revenues, see income by date, by client and by server - with each server's cost estimated from the monthly price you set when you added it, so you can see real profit per server, not just revenue. Defaults to the current month, with a custom range available.
Tickets gives you one inbox spanning both your own account's tickets and every ticket raised by your subscribers. Live Chat is a real-time queue shared between you and your support team for talking to clients directly.
Once you're past handling support yourself, add staff accounts from Support Team - scoped to tickets and chat, without full access to your servers or billing.
From API, generate a Bearer token - named, and optionally set to expire. Anything you'd normally do by hand (creating a subscriber, checking a site's status, triggering an SSO login) can be done through the same endpoints - this very site's own signup and login pages use exactly this API.