
Everything involved in using your own hosting once your agency has set up your account.
When you log in, you land on your own dashboard - your total sites and their status, your current plan and how much of it you've used, and a shortcut into support if you need it.
Go to Websites in the sidebar, then click + New Site. The form has three steps:
Subscription - which of your active plans this new site counts against.
Web Server (Apache or Nginx) and Application - WordPress, Laravel, a plain PHP site, or Node.js. Only the site types your plan allows will be selectable here.
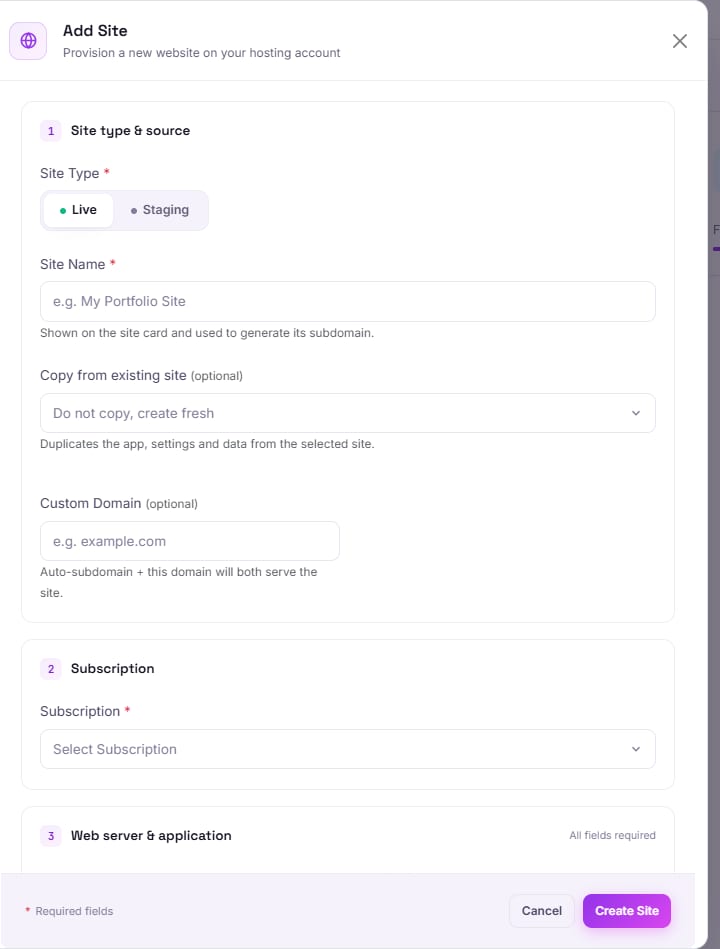
Click Create Site. It gets its own isolated container and a free SSL certificate from the moment it's live.
Instead of building manually, click Build With AI. Answer a few questions about the business, its colours and its tone, or hand it a URL of a site you like the look of (never a copy, just a starting direction) - it drafts a real, working site: pages, copy, a logo, and photos.
After launch, keep shaping it in the same chat - ask for a new section, a colour change, or a new page in plain English, and the edit ships straight to the live site. WordPress sites use a separate chat built around how WordPress itself works, but the experience is the same conversation either way.
From a site's own page you can change its PHP version (7.4 through 8.4 - the panel rebuilds the container in the background with no data lost), switch between Apache and Nginx, turn on a staging copy to test changes safely, and see its disk, bandwidth and uptime.
A site's Database tab lets it connect to any database engine your agency has installed on the same server - MySQL, PostgreSQL, or MongoDB.
If your plan includes email, the Email Accounts tab lets you add a mailbox on your own domain, set its storage quota within your plan's overall allowance, deactivate one you no longer need, or open webmail directly.
Point a domain at your site and manage its DNS records directly - the same record types you'd manage in Cloudflare itself (A, CNAME, MX, TXT and the rest), plus SSL mode and caching, including an instant cache purge whenever you ship a change.
From a site's Git tab, connect a repository - a brand new one, a new branch on an existing project, or one you already use - and every push to that branch deploys straight to the live site through a webhook. Disconnect it just as easily if development moves elsewhere.
Schedule a recurring job from a set of presets or write your own schedule, run one immediately to test it, and read its logs afterward.
A site has its own firewall rules, separate from anything your agency sets server-wide, plus its own SSL mode and caching settings.
Invite someone else into a specific site without handing over your whole account - useful for bringing in an outside developer or your own staff member.
See the plan currently active on your account, your usage against its limits, and the invoices raised against it, all without needing to ask your agency directly. Add another plan, or increase the quantity on one you already have, from the same page.
At signup, pick a plan and how many you need - the quantity scales the price automatically. If your agency collects payment through the panel, you'll pay before your account is created; if not, your account activates immediately and billing is handled the way your agency has arranged with you directly.
Whenever real payment is required - a new subscription, adding to an existing one, or paying an invoice - you're offered whichever of PayPal, Stripe or your agency's own offline payment option (e.g. bank transfer) they've made available. PayPal and Stripe activate your plan or mark the invoice paid the moment payment completes. Choosing the offline option instead asks for a reference and a receipt upload, then waits for your agency to review and approve it - you'll be notified either way.
Open Payment Details on any subscription to see exactly how it was paid, its transaction ID, and every past charge against it - handy if you ever need to reference a specific payment.
Raise a ticket straight to your agency's support inbox from inside the dashboard, and follow the reply in the same place.
From My AI, connect your own account for Gemini, Claude, ChatGPT, OpenRouter, or OpenCode Zen. Connect more than one, and a site build tries each in turn until one succeeds - so a single provider having an off day doesn't stop your build.